Showing posts with label Dinner. Show all posts

Sunday, July 20, 2014

Asian Market Soup


One of our favorite family "field trips" is a trip to the Asian Market in Plano.

Beautiful colors in the produce section

We always seem to come home with new foods and ingredients to try.

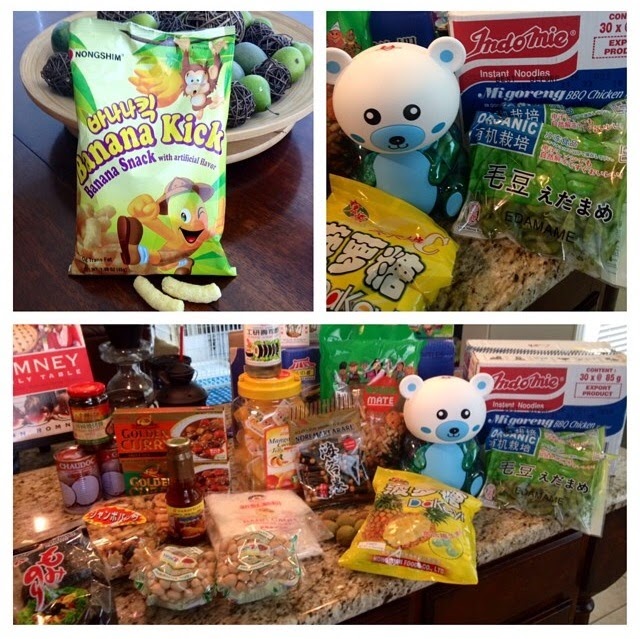
So many new foods to try!

I have always enjoyed Asian soups. The flavors are delightful and light. So armed with some shrimp, mushrooms, and Banh Canh noodles, I came up with this recipe. It was a hit!

Asian Market Soup
Serves 6


1.5 pounds raw shrimp - peeled and deveined
8 green onions, washed and chopped
1 large thumb sized piece of ginger - 2/3 grated and 1/3 chopped
2 stalks lemon grass - remove rough outer stalks and finely chop tender inside
3 T olive oil
10 cups water
1 1/2 t salt
1/2 t pepper
2 T sugar
3/4 cup baby carrots chopped
2 - 3.5 oz. packs organic beech mushrooms - cut off of stem so pieces are 1-2 inches long
2 packages Vietnamese noodles (Banh Canh)

Smash 1 pound of the shrimp using the flat of your knife then roughly chop along with the white parts of the scallions and some salt and pepper until finely ground.  


Heat olive oil over high heat until shimmering. Cook ground up shrimp along with grated ginger and lemon grass until no longer pink and slightly browned…about 3 minutes.


 With heat still on high, add 10 cups of water and deglaze the pan. 


Season broth with sugar, salt, and pepper to taste. Bring to boil, lower heat add mushrooms and carrots and allow to simmer until carrots are crisp tender about 5 minutes. 


While soup is simmering - in a small frying pan cook remaining 1/2 pound of shrimp over low heat in olive oil with the chopped up ginger.  Cook until shrimp just barely turn pink.  Set aside to use to garnish each bowl of soup.


Add remaining chopped scallions (green parts) and banh canh noodles to the soup pot and continue to cook until noodles are slightly translucent. Remove from heat.


Ladle soup into bowls and top with your cooked whole shrimp/chopped ginger mixture.  Serve and enjoy!


*Instead of adding Vietnamese noodles you can add frozen chinese dumplings or potstickers and cook until heated through.


Wednesday, December 28, 2011

Quick Calzones - Recipe of a Busy Housewife


So "this is how we do" when I find out last minute that the family won't be going out for dinner  tonight...

First my mind started spinning - what ingredients do I have around?  What will the kids and husband like? What will I like? What's fast and easy?  What can I take pictures of for the blog with the new camera?  Even though I've never made them before?  Or even ordered one at a restaurant?  Seriously.

Voila.  Of course.  Calzones.  That's what you would have thought of right?!?!

Here we go.  Remember, only an hour until dinner time...

Make some pizza dough using the family standby recipe (click here for that easy recipe).  Understanding that it will only be able to rise for maybe like 15 minutes today.

Done.  Pop it in the oven using the ever so useful - but not necessary - "Bread Proof" function on my oven (I adore that little feature).

Grab some frozen pepperoni and Canadian bacon out of the freezer and set it on the counter to thaw.

Fold laundry.  Or rather a shirt before realizing that the mozzarella is frozen too! Return to the freezer and get out some grated mozzarella.  Set it on the counter near the pepperoni and CB.

Finish folding laundry.

Divide barely risen dough into 7 equal(ish) portions.


Roll out the dough balls one at a time into a circle(ish).


Put some pepperoni, Canadian bacon, and oh - look what I found in the fridge - crumbled bacon bits on half of the dough "circle."  Top with still partially frozen mozzarella.


Fold the dough over and try to seal it.  Realize that the dough is not sticking to itself. Have a flashback to a random Food Network episode where they made empanadas and recall that they wet the edges of the dough with water to make it stick (I really had that random helpful thought).  Wet the edge of the dough with water.  Refold.  Press to seal - hey it worked!

Crimp the edges to make it look fancy for photos.


Hmmm...well that didn't work out so well.

Try again.


Getting better.

Repeat with all of the dough and meat.


Sometime up above I started preheating my oven and pizza stone to convection bake (or you could just regular bake) at 400. Who KNOWS when I did that - just glad I did ;)

Pop those babies in the oven.  Peek after 10 minutes and realize they look kind of dry.  Brush with some olive oil and bake 5 more minutes. 


Remove from oven, slice in half and serve with a jar of Market Pantry pasta sauce for dipping.


I also made a salad.

Dinner took an hour and 15 minutes to make.  The natives were hungry and enjoyed their meal even more because it was 15 minutes late (and smelled delicious cooking).

Bonus:  laundry folded

Double bonus:  Eating out tomorrow night instead - crossing fingers :)

The kids and husband LOVED them.  I really liked them, but wished I had sprinkled a dash of italian seasoning or something inside before I sealed them up.
I know there is NO WAY you can follow that recipe. So in case you ended up here really wanting to make calzones click here for a REAL calzone recipe.

Phew.  I'm tired.

Monday, December 26, 2011

New Mexican Pork Chile Verde


This recipe is one that my sister gave to me.  It is warm, hearty, filling and delicious!  My kids love it - even when I end up using hotter than usual green chiles and our tongues feel the burn ;)  We had it tonight for dinner, and ironically my sister called to visit right as I sat down to type this post (I am hearing the "Do do do do - do do do do" Twilight theme song in my head right now).  My sis lives in New Mexico and has much better access to fresh frozen green chiles than I do.  I have to use the ones from a can. If you ever spend any time in New Mexico when they are harvesting the Hatch chiles, you are treated to the experience of seeing them roast the chiles in giant roasters.  Cool to watch and it smells great too!

Green Chiles Roasting

New Mexican Pork Chile Verde
Click here for a printable version

Best made in a large Crock Pot

16 oz carnitas/pre-cooked, thawed, seasoned pork (see *NOTE below)
1  can chicken broth
1 pint mild chopped green chile (thawed) (or 1 can fire roasted green chiles)
4 oz hot chopped green chile (thawed) (or 1 can fire roasted green chiles)
3 stalks celery, chopped
1 medium yellow onion, chopped
2 lbs potatoes, peeled and diced into ½ inch-or-less cubes (about 5 medium russett potatoes)
3 cloves garlic, minced
1 ½ tsp red chile powder
1 tsp kosher salt
½ tsp ground black pepper
½ tsp garlic powder

1. Put all stew ingredients in Crock Pot. Stir. Turn on High.  After stew has been actively simmering for an hour or so, pull the pork pieces into shreds using 2 forks.  Continue cooking, stirring occasionally and shredding pork pieces until potatoes are tender.  Total cooking time is usually 4 ½ - 6 hours.


2. Serve with warm flour tortillas and fresh chopped cilantro.


*NOTE - The stores I normally shop at don't usually carry pre-cooked carnitas.  When I don't have the precooked, I will make my own:

Slow Cooker Carnitas
From allrecipes.com

1 tsp salt
1 tsp garlic powder
1 tsp ground cumin
1/2 tsp crumbled dried oregano
1/2 tsp ground coriander
1/4 tsp ground cinnamon
1 (4 pound) boneless pork shoulder roast
2 bay leaves
2 cups chicken broth

1. Mix together salt, garlic powder, cumin, oregano, coriander, and cinnamon in a bowl. Coat pork with the spice mixture. Place the bay leaves in the bottom of a slow cooker and place the pork on top. Pour the chicken broth around the sides of the pork, being careful not to rinse off the spice mixture.

2. Cover and cook on Low until the pork shreds easily with a fork, about 10 hours. Turn the meat after it has cooked for 5 hours. When the pork is tender, remove from slow cooker, and shred with two forks. Use cooking liquid as needed to moisten the meat.


Monday, July 11, 2011

Sweet Southern Cornbread


I have never been overly fond of cornbread. I think it's a texture thing. It always seems dry and gritty to me, and the flavor is a bit boring. So I started fiddling around with the ingredients until I came up with this recipe. This makes the most wonderful, moist, sweet cornbread ever.
Now I'm a fan!

Sweet Southern Cornbread


1 3/4 cups flour
2/3 cup sugar
2/3 cup cornmeal
1 Tbs baking powder
1/2 tsp salt
1 cup milk or buttermilk (buttermilk is better!)
2 large eggs
1 teaspoon vanilla
1/3 cup vegetable oil (or coconut oil)
3 Tbs butter, melted
1 cup creamed corn

Preheat your oven to 350°. Grease an 8 inch square pan.

First off, if you're not sure what coconut oil is, it looks like this:


I found mine with the other oils in my grocery store.  At room temperature it is a solid, so I melt it in the microwave to use in this recipe.  It adds a little something yummy to the flavor of the cornbread, so in my opinion it's better than using canola or vegetable oil. But I digress. . .

In a large bowl combine the flour, sugar, cornmeal, baking powder, and salt.


OK, for the record, I too am wondering why on earth I decided to mix yellow ingredients in a yellow bowl - not great for pictures!  Live and learn.

In a separate bowl combine the milk, eggs, oil, melted butter and vanilla and mix well.


Add the wet ingredients and the creamed corn to the flour mixture and stir just until blended.


Again, what's with the yellow bowl - sheesh!

Pour into your greased pan and bake for 45 - 50 minutes or until light golden brown on top. A toothpick poked into the center should come out clean.


Wait! That's a 9x13" pan and my directions said to grease an 8" square pan - what the heck!

My bad.  Clarification - my family of six loves this cornbread, so I always double my recipe and bake it in a 9x13" pan for 50 - 55 minutes.  That way we have some leftovers to enjoy for breakfast or lunch the next day. Soooooo:

Single recipe as listed above = 8" square pan baked 45-50 minutes
Double recipe = 9x13" pan baked 50-55 minutes

Are you confused yet?  Hope not.

When it's done, let it cool for 15 minutes then slice and serve.


We love it with butter and honey.


Monday, June 20, 2011

Zesty Lemon Chicken Ring


I'm not sure a person should admit this - but I really enjoy Hot Pockets. So it's no wonder that this chicken ring is one of my all time favorite dinners. It's like having a slice of THE BEST Hot Pocket you've ever had. It's almost shameful to compare the two, because this is so dang good - not to mention easy to make - which makes it even better :) Your family and friends will be so impressed when they see your beautiful creation!

Zesty Lemon Chicken Ring

2 cups chicken breast, cooked (I use one large breast and boil it for 10 minutes to cook through)
1 cup frozen broccoli, cooked (don't be afraid to use the cheaper "broccoli pieces" for this recipe - it will still taste great) (or you can cook up some fresh broccoli if you have it)
1/2 cup red bell pepper
2 cloves garlic, pressed
1 tsp lemon zest
1/2 cup Parmesan cheese, shredded
3/4 cup shredded mozzarella
1/2 cup mayonnaise
1 tsp Italian seasoning
1/4 tsp salt
2 packages Pillsbury crescent rolls (I prefer the "Butter Flake" flavor)


To make the filling chop the chicken, broccoli and red pepper into small pieces.  Place in a bowl.  Add cheeses, mayo, garlic, lemon zest, salt, and italian seasoning.  Mix well.


Unroll the crescents and arrange triangles in a circle on a round baking stone with bases overlapping in center and points toward outside. I place my 5" round biscuit cutter in the middle of the pan to help me make a circle. 


Once your dough is laid out, press the base of the triangles near the center to flatten and seal. This will give you a nice base to place your filling onto.

I use a 1/4 cup scoop to place filling onto widest portion of each triangle, but a large spoon would work also.


Fold the dough points over the filling and tuck under the base in the center to seal.


Work your way around until the filling is wrapped in dough - you do want to see some filling poking through!


Bake at 375 degrees for 25-30 minutes.  Make sure the crust is a deep golden brown and cooked through (a doughy crust is not a delicious crust!)

Let the ring rest/cool for 5 minutes.  I will often slice and serve directly from my baking stone, but to make it fancy for pictures I carefully transferred it to a serving plate.


When we had this for dinner last night - and we polished the whole thing off - we decided that from now on we are a "2 chicken ring family!" By the way, one of our teenagers wasn't even home to help us eat it - yikes!


Sunday, August 29, 2010

Grilled Pizzas


One of our favorite dinners is "make  your own pizza" night.  When we first started doing it I would set out a huge variety of toppings for the kids to choose from, and all they would use is the pepperoni, olives, and Canadian Bacon. So to prevent unnecessary labor and waste, our topping bar usually only consists of a few well loved toppings, but when we have guests over we get fancy and break out more!


First you need some good dough.  This is the recipe I use.

Pizza Dough

1 1/2 cups warm water
2 t. yeast
2 t. sugar
2 t. salt
2 T. olive oil
4 1/4 cups flour

Dissolve yeast in warm water.  Add sugar, salt, and olive oil.  Mix in enough of the flour to make a soft dough.  Knead dough on a floured surface.  Cover and let rise 1-4 hours until ready to use.  Divide dough into 6 balls and let rest 10 minutes.  Roll out and place on greased pans dusted lightly with cornmeal.

I purchased a dozen 10 inch pizza pans from an online restaurant supplier a few years back, and we use them all the time.  Click here if you need some too :)

Then you need some sauce.  You can buy some or it's really simple to make.  For the grilled pizzas I like to make a fresh summertime sauce made with fresh basil from my backyard.

Summertime Basil Pizza Sauce

1 can Hunt's Fire Roasted Tomatoes (or petite diced)
1/4 cup fresh basil leaves
1 Tbs Parmesan cheese grated
3 cloves garlic, pressed
1 teaspoon italian seasoning
1/2 teaspoon onion powder
1/2 teaspoon salt
1/2 teaspoon sugar

1. Wash and rough chop basil leaves.  Place all ingredients in a food processor and blend until smooth.

2. Let sit 2 or more hours before using.

Then set out your favorite toppings like canadian bacon, pepperoni, olives, mushrooms, green peppers, bacon crumbles, tomatoes, pineapple, etc.

Sauce your crust, sprinkle with grated mozzarella, top with your toppings.  Here's mine:


The dough is too soft to place directly on the grill, so I oven bake these a 425 for 8 minutes first.  They come out not quite done like this:


Then take them outside and slide them off the pans onto a preheated medium low grill.


Close the cover and let 'em cook.  The whole point in grilling them is so that the crust on your pizzas will be phenomenal, and your backyard will smell like a brick oven pizzaria.  I check the bottom crust often and pull them off the grill when it looks dark brown and crispy but not burned. Let them cool 5 minutes, slice and serve.  Trust me, these are really good!
Related Posts Plugin for WordPress, Blogger...