Showing posts with label Dessert. Show all posts

Monday, August 11, 2014

Happily Ever After Cupcakes


Oh. My. Gosh. These cupcakes taste AMAZING!!!

A month ago we traveled back to the East coast to celebrate my inlaw's 50th wedding anniversary. My sister-in-law made a gorgeous and delicious wedding cake, which got me thinking about how much I love the flavor of wedding cakes. Unfortunately, there are no wedding receptions on my calendar for the near future.


Luckily, I'm a problem solver. After some visits to my Pinterest boards, I put together these little gems by combining a couple different recipes. The rest is history.

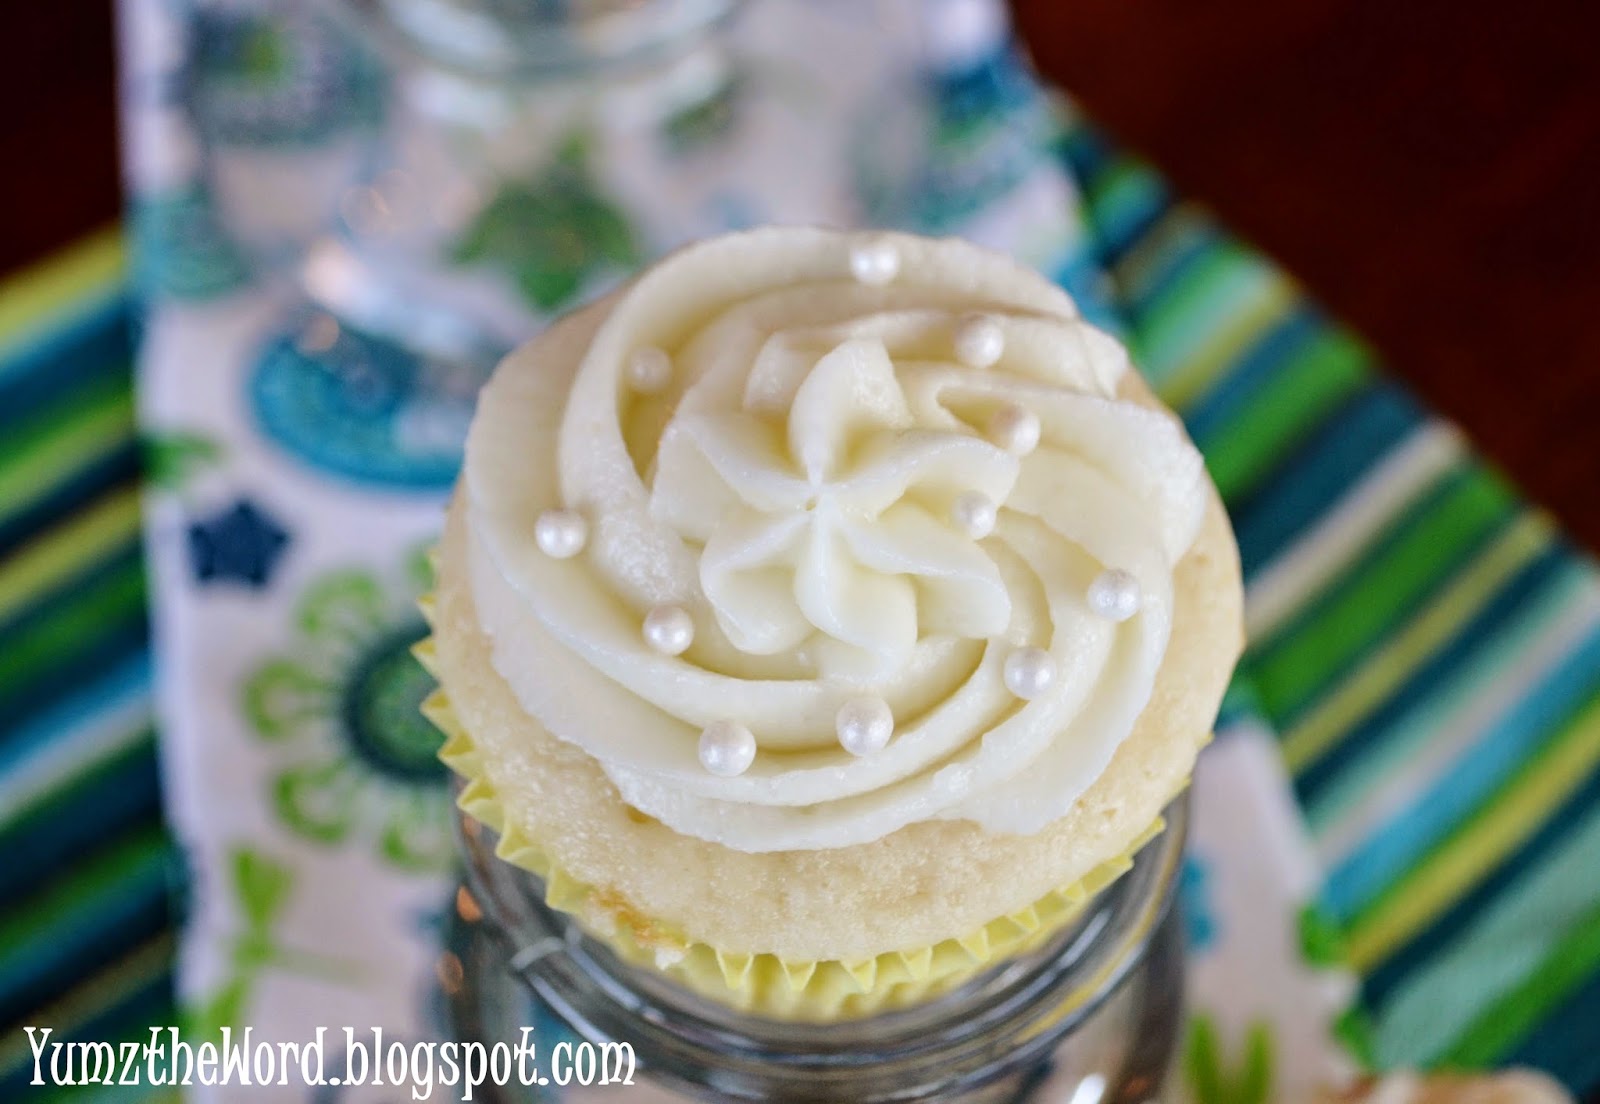
A light White Almond Wedding Cake recipe (made with a cake mix!) which is super duper moist, filled with homemade fresh raspberry preserves, and topped with a fluffy Almond Buttercream Frosting. You can thank me later - when you're enjoying your cupcake(s).

And we all lived Happily Ever After.

Wedding cupcakes, almond cake, raspberry filled

Happily Ever After Cupcakes

White Almond Wedding Cupcakes:

1 package white cake mix
1 cup all-purpose flour
1 cup white sugar
3/4 teaspoon salt
1 1/3 cups water
1 cup sour cream
2 tablespoons vegetable oil
1 teaspoon almond extract
1 teaspoon vanilla extract
4 egg whites

Preheat oven to 325 degrees. Line cupcake pans with cupcake liners.

Stir together the white cake mix, flour, sugar, and salt in a large bowl until well mixed. Pour in the water, sour cream, vegetable oil, almond and vanilla extracts, and egg whites, and beat with an electric mix on low until all the ingredients are mixed and moistened but some lumps still remain, 4 minutes.

Pour the batter into the prepared cupcake pans, and bake in the preheated oven until the top is a light golden brown and a toothpick inserted into the center of the cake comes out clean, about 25 minutes. Allow to cool before frosting.

Filling:

1/2 cup raspberry freezer jam or raspberry preserves

Fill a pastry bag or Clear Plastic Squeeze Bottle with raspberry filling. Poke the tip into the top of each cupcake. Squeeze approximately 1 tsp filling into each. Remove and continue until all cupcakes are filled.

Almond Buttercream Frosting:

1/2 cup unsalted butter, softened
1/2 cup heavy cream
1 1/2 tsp Almond Extract  
4 cup powdered sugar

Beat butter and heavy cream in mixer for 3 minutes. Add in almond extract and powdered sugar. Beat an additional 5 minutes until light and fluffy. Pipe on cupcakes.

Wedding cupcakes, almond cake, raspberry filled

Wedding cupcakes, almond cake, raspberry filled


Friday, July 1, 2011

Bee Treats


Recently our church youth group had an activity that had a Beehive/Bee theme.  I was asked to bring refreshments and was finding it hard to come up with any good/easy ideas. As I was pondering I got a bee in my bonnet and thought, "Hmmm, what could I make with Honeycomb cereal."  Of course whenever I think of cereal and treats, I think of rice crispy treats.  So I modified that recipe to use Honeycomb and decorated the tops of the treats with these cute little (and easy to do) m&m bees.  It was one of those things that turned out WAAAAY BETTER than I ever imagined.

Bee Treats

1/4 cup butter
1 bag miniature marshmallows
6 cups Honeycomb cereal
1 cup frozen m&m's
Few drops yellow food coloring (optional)

Before you start, open the bag of m&m's and pick out all of the brown and yellow ones - you'll need these to make your bees!!  Put the rest in the freezer to stir into your Honeycomb treats later.

In a large saucepan melt the butter over low heat. Add the marshmallows and stir until completely melted. Remove from heat (if you decide to make some of your treats yellow - now is the time to stir in that yellow food coloring).

Pour over the Honeycomb cereal in a very large bowl. Stir until well coated.


Quickly, before the goo starts to set, stir in your frozen m&m's. Notice there are no yellow or brown m&m's left!


Using a buttered spatula or wax paper evenly and firmly press the mixture into 13 x 9 x 2-inch pan coated with cooking spray. Cool.


At this point I also made a batch of yellow colored treats (with no m&m's mixed in and not to be decorated with bees) just to make sure I had plenty of treats for the occassion.

Here is the yellow goo (with food coloring added).


Being poured over the Honeycomb.


Pressed into the pan.


Here are the pans of unadorned treats.  I made two batches of the m&m kind, beecause I knew there would be about 22 girls at the activity.


After they have cooled cut them into squares.  I got 12 squares per pan.


All right, it's time to make some bees!! I found this picture and instructions to help me out.

Bees

Lots of yellow and brown m&m's
1 bag sliced almonds
Small candy sprinkles (for the eye pupils)
Toothpick
Tweezers
Frosting (either a white canned frosting, or you can whip up a quick batch by creaming 1/4 cup shortening and 2 cups confectioners sugar until smooth, then mixing in 2 1/2 T. milk and 1/2 t. vanilla until smooth and stiff - about 5 minutes)  I made my own frosting because I like the texture and super white color.

First make the eyes (as you can imagine this was the most tedious part of the whole process) by using a toothpick to dab 2 small dots of frosting on a brown m&m.  Use tweezers to set 1 candy sprinkle on top of the frosting and press in place.  Repeat until you have enough cute little bee faces for your treats.


Phew, the tedious part is done! Now it's time to assemble the bees. First, using a star tip, pipe a mound of frosting on top of the Honeycomb square.


Next start building your bee.  Start with a yellow m&m at the bottom, next a brown, then another yellow. . .


Carefully put a little brown face at the top.


Give him 2 little almond slices for wings - bzzzzzzzzzz.


Here are a side and back view.


Repeat until all of your treats look un-bee-lievable!


Then take them to your activity. . .you'll be all the buzz ;)

Tuesday, June 28, 2011

Flag Cupcakes

This one's more about nostalgia than about the recipe.


Up until 4 years ago I spent every 4th of July at my Grandparent's home and acreage in Reedsport, Oregon. Each year all of my Muffett aunts, uncles, and cousins would gather here for a phenomenal holiday bash. Great food would be served, games would be played, stories would be exchanged, and fireworks (the good ones) would be lit. It was so much fun. It was one of those events that I always enjoyed and treasured, but never really understood how difficult it would be to recreate until everyone started growing up and moving away.


The food was always a potluck of the most wonderful picnic foods brought and shared by everyone. It would all be set out on my grandmother's dining table, and I remember the wonderment I had as a kid that I was allowed to eat whatever I wanted, whenever I felt like it. Being able to just grab a handful of BBQ potato chips when I wanted to was a very special thing. There was roasted chicken, sandwich meats and cheeses, Grandma's unbeatable potato salad, baked beans, chips, veggies, fruit and so much more. Outside would be a big cooler full of ice and most any softdrink or juice you could want - chilled to icy perfection. We would eat watermelon on Grandma's big porch and roast hot dogs and marshmallows over a big campfire that was built each year on her gravel driveway. The sticks we used to roast with were gathered and whittled by "the boy cousins." From the moment we arrived there would be 4-8 ice cream machines churning out multiple gallons of the best homemade ice cream ever (in the earlier years we had to hand crank it). It was a simple recipe that my Grandpa Muffett used to enjoy as a child made from fresh milk and cream. We would top this delight with my Grandma's homemade hot fudge sauce. Ohhh, my mouth is watering as I type.


And each year my mom would make a wonderful half sheet white cake chilled and topped with whipped cream. She would artfully arrange blueberries and raspberries on top to make it look like a US flag. Simply beautiful and absolutely delicious. I can still taste the fresh sweetness of that chilled flag cake.

This year as we enjoyed a quiet 4th of July to ourselves, I pondered the good ole days and missed them a lot. I made these flag cupcakes in honor of my mom's flag cake, and I plan on using the month of July to prepare and enjoy many of the other foods that I remember so fondly. Next up Muffett Homemade Ice Cream with Grandma's Homemade Hot Fudge Sauce - I can hardly wait!


Flag Cupcakes

1 box white cake mix
1 container White Frosting
1 pint fresh blueberries
1 pint fresh raspberries
1 cup sweetened coconut flakes

Prepare cake mix as directed on box and bake into 20 cupcakes. Allow to cool then frost cupcakes with frosting. Arrange blueberries on 4 of the cupcakes, raspberries on 8 of the cupcakes, and dip the remaining 8 cupcakes in the coconut. Arrange on a platter or breadboard as pictured above to look like a US flag.


Saturday, June 25, 2011

Lemon Berry Tart


So you made that wonderfully tart lemon curd.  And whipped it into a light and fluffy lemon mousse.  Let's take it a step further and make a lemon tart to pile sweet berries upon!  I used frozen blueberries for this one (my kids and I picked 25 pounds at The Berry Patch in Sadler, TX), but it is also de.light.ful. with fresh berries mounded on top - strawberries, raspberries, blackberries, blueberries. . . whatever berries you have on hand.

Lemon Berry Tart

First make your tart shell. . .

Tart shell
1 1/2 cups all-purpose flour
1/2 cup confectioner’s sugar
1/4 tsp salt
9 Tbs very cold unsalted butter, chopped up into small dice
1 large egg 

Add the flour, sugar, and salt to a food processor and pulse a couple of times until they’re mixed together. Add in your COLD lumps of butter. Pulse for a few beats. The mix will look coarse and grainy and a few pea-sized butter bits should remain.

Add in your egg - pouring it around the whole surface. Pulse again, paying close attention to not let the food processor get away from you. Let it come almost to a ball of dough but not quite. Then  knead the rest by hand. Overprocessing the dough can make it tough.

Unload it to a work surface and give to a few turns and presses until it just comes together.  Form the dough into a disk shape. Wrap the disk in plastic and refrigerate for a couple of hours to chill the dough thoroughly.

Roll out your chilled dough on a lightly floured surface. It should be about 3 inches larger in diameter that your tart pan. I like to roll my dough on a piece of parchment or wax paper to keep it from sticking to the counter. Sparingly sprinkle with flour as needed to keep it from sticking.

Once rolled, drape it over your rolling pin and transfer it to your tart pan. Peel away the parchment paper if you used it. Press it into your tart pan, making sure to get it to butt up against the corner edges of the pan. If you get tears in your dough, patch it with the scraps. The excess can hang over the edge. Cut away the excess.

Prick the tart all over with a fork and place the tart shell in the freezer for at least 30 minutes before baking (or longer, if you want to make it the day before). This will help the shell keep its shape when the heat of the oven hits it.


Preheat the oven to 375 degrees. Remove the shell from the freezer and tightly fit a sheet of tin foil inside the tart shell, taking care to tuck it into the contours. Place the tart on a baking sheet and bake the shell approxiamately 25 minutes - or until golden brown. Let cool completely before filling.


Next let's make our blueberry topping - if you're using fresh fruit just skip this step!

Blueberry Topping
1 cup blueberries - fresh or thawed from frozen
1/4 cup sugar
1 T. cornstarch
1/4 cup water
1/4 t. lemon zest (optional)

Place the blueberries in a small saucepan. In a small bowl mix together the sugar and cornstarch. Sprinkle over the blueberries, add water and stir. 


Cook and stir over medium heat until mixture thickens and becomes clear. 


Stir in lemon zest if desired.


Now let's assemble that tart!

Remove your cooled tart shell from the pan and place it on a pretty plate or cake stand.  Spoon your lovely lemon mousse into the shell until it is 1/2 inch from the top.  Mound with beautiful fresh berries - or - drop spoonfulls of your blueberry topping onto the mouse.  Gently swirl by running a knife slowly through the berry topping.  Enjoy!


Saturday, June 18, 2011

Lemon Mousse


 Ok, so now we've made our lemon curd (click here if you missed it).  If you didn't eat it all up yet, we can use it to make a wonderful lemon mousse.  This mousse is delicious served all on it's own, or it can be used as an ingredient in tarts, cakes and pies. 


Lemon Mousse

1 cup heavy cream
1/4 cup sugar
1 1/2 cups lemon curd

In a medium mixing bowl, whisk together the sugar and heavy cream to soft peak stage.


Because we whipped air into the cream and made it light and delicate, and because the curd is heavy and dense, we will fold the cream into the curd gradually, so we don’t completely deflate the cream. Scoop a third of the whipped cream into the bowl with the curd. You can eyeball this. It doesn’t have to be exact. Gently fold it in.


Scrape in the rest of the heavy cream and fold it in.


That's it. You're done. Easy peasy. Now you're faced with the tough decision of whether to spoon it into parfait cups to eat right away, or perhaps take it a step further and make a lemon berry tart - recipe to follow!

Whatever you decide, make sure you refrigerate your treat until you're ready to eat or use it :)

Tuesday, June 14, 2011

Lemon Curd


Lemon curd - oh how I love your happy color and the way your bright flavors zing my tongue and make my cheeks pucker with your sweet sourness.  So summery and a great way to use fresh lemons when you find them 10/$1.  Once you've made your delicious lemon curd (which tastes awesome by the spoonful) you can turn it into Lemon Mousse or a Blueberry Lemon Tart or Lemony Sunshine Cupcakes.  All of these recipes will soon follow. I guess this will be my first "blog recipe series."

But for today, let's start with the basic ingredient for all of these lemony wonders - the lemon curd.  This is by far the easiest lemon curd recipe ever.  It requires no tempering of the eggs and no straining.  I LOVE easy.  And the taste is tart perfection.  So, here we go.

Lemon Curd

6 Tbs butter, softened
1 cup sugar
2 large eggs
2 large egg yolks
2/3 cup fresh lemon juice
1 tsp grated lemon zest
4 drops food coloring, optional

Seriously - aren't these some of the prettiest ingredients ever!
In a large bowl, beat the butter and sugar with an electric mixer, about 2 min. Slowly add the eggs and yolks. Beat for 1 min. Mix in the lemon juice. The mixture will look curdled, but it will smooth out as it cooks.

In a medium, heavy-based saucepan, cook the mixture over low heat until it looks smooth. (The curdled appearance disappears as the butter in the mixture melts.)


Increase the heat to medium and cook, stirring constantly, until the mixture thickens, about 15 min. I know, 15 minutes is a long time, but while you're stirring you can imagine all the wonderful ways you will be enjoying your delightful lemon curd. When it has thickened enough it will stick to the back of your spoon and when you run your finger through it it leaves a path. Don't let the mixture boil.

Remove the curd from the heat and stir in the lemon zest and optional yellow food coloring (I did not use food coloring in this batch). For this recipe I prefer to peel my lemons with a potato peeler which gives me big chunks of zest.  I can then chop them into the size I want (I like bigger bits) and freeze the leftover zest for when I want to brighten the flavor in some of my other recipes.


Transfer the curd to a bowl. Press plastic wrap on the surface of the lemon curd to keep a skin from forming and chill the curd in the refrigerator. Or you can spoon it into small canning jars that can go into either the refrigerator or freezer. The curd will thicken further as it cools. Covered tightly, it will keep in the refrigerator for a week and in the freezer for 2 months.


You can also substitute limes and make lime curd - this too is awesome stuff!!


Yield: 2 cups

Here's a teaser for what we might do with our lemon curd. . .


Are you hungry yet?
Related Posts Plugin for WordPress, Blogger...